Grid View + Clips
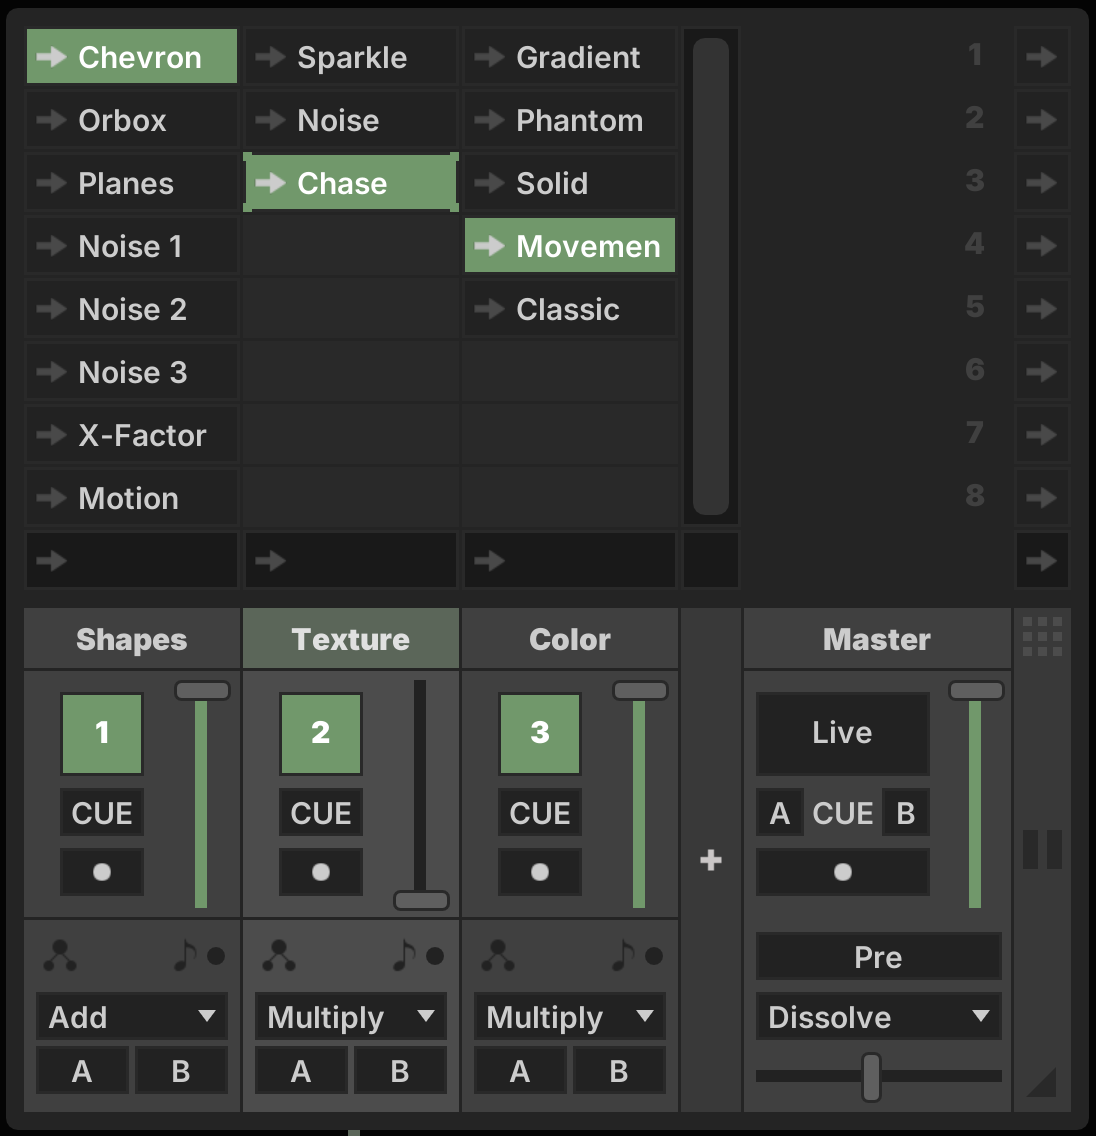
The Grid is displayed above the Mixer, and allows rapid multi-channel control of Patterns or Clips, particularly when working with a MIDI Control Surface. Toggle the Grid by pressing ⇧> or clicking in the Status Bar.
Toggle between Pattern Mode ![]() and Clip Mode
and Clip Mode ![]() using ⇧⌘>.
using ⇧⌘>.
Launch Quantization
All Grid operations respect the Launch Quantization setting in the Toolbar.

When set to None grid operations are processed immediately. With any other setting, grid actions are deferred until the metronome next crosses the specified tempo division. Launch buttons pulse visually when a deferred action is pending.
Pattern Mode
Pattern Mode enables a simultaneous view of the patterns running across all channels in the project. Launch patterns by clicking on the launch icon ![]() or pressing .
or pressing .
Patterns in the grid may be renamed with ⌘R, reordered with ⌘↑ + ⌘↓, duplicated with ⌘D and deleted with DELETE.
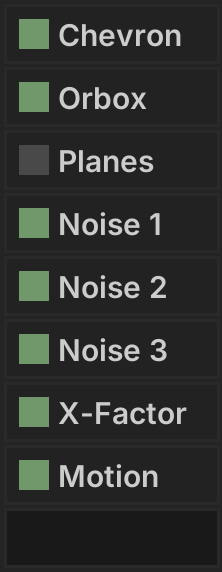
Composite Mode
For channels in Composite Mode, Enabled toggles are shown instead of Launch buttons.
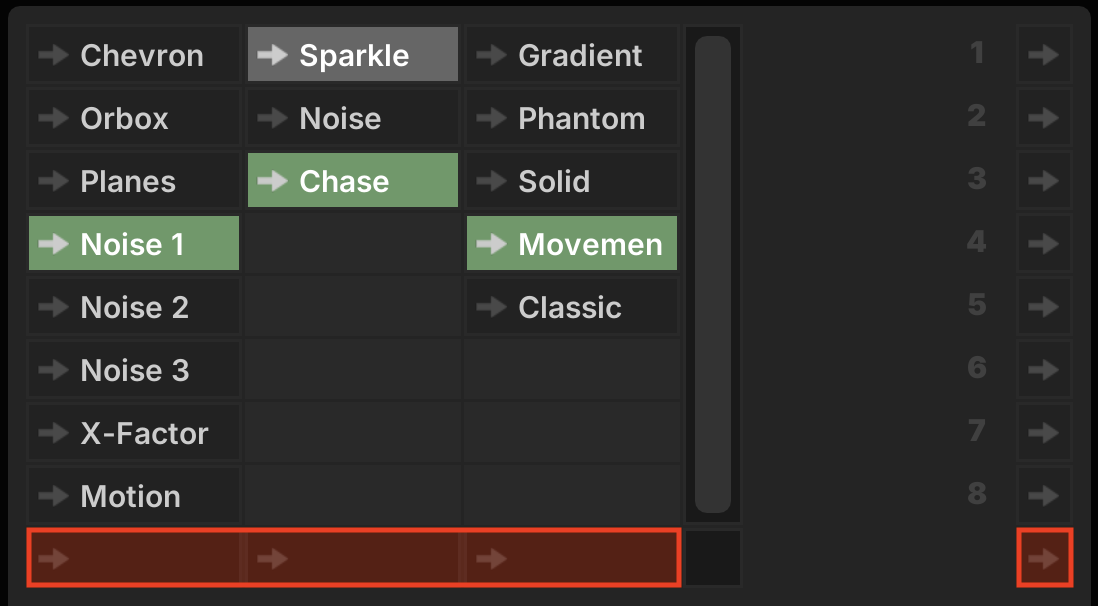
Pattern Cycle
Cycle through patterns using the Pattern Cycle buttons at the bottom of the Grid. This button respects each channel's Auto-Cycle Mode, transitioning either to the Next pattern on the channel or a Random pattern.
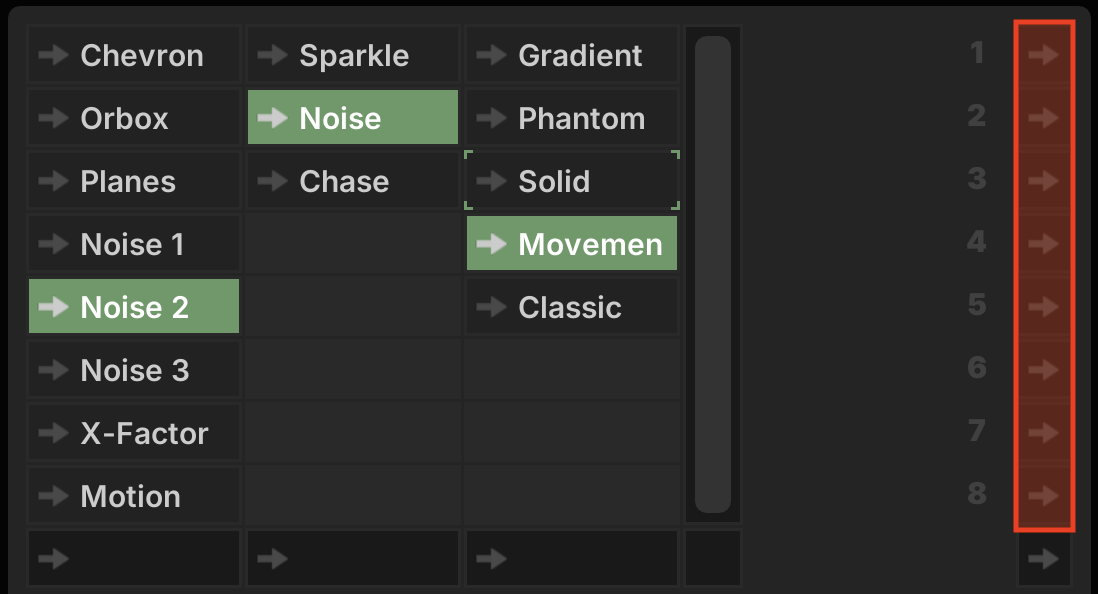
Pattern Scene Launch
Launch all patterns at the same index across the grid using the Pattern Scene Launch buttons on the right-hand side of the Grid.
Clip Mode
Clip Mode allows the creation and recall of clips containing two types of control data, Clip Automation and Clip Snapshots.
To create a new-clip, double-click or press RETURN in an empty slot. Clips in the grid may be renamed with ⌘R, duplicated with ⌘D and deleted with DELETE.
Clip Automation
Clip Automation allows for timeline based-control over clips. When a channel has its Arm ⇧C setting enabled, the clip shows a record button ![]() . Click this button to begin recording Clip Automation.
. Click this button to begin recording Clip Automation.
When a Clip contains automation, the Play icon ![]() is displayed next to the name of the Clip. It is played back when the clip is launched.
is displayed next to the name of the Clip. It is played back when the clip is launched.
Clip Automation contains:
- The channel's active Pattern state
- Parameters changes on all Patterns and Effects
- MIDI Channel Events
Clip Snapshots
Clip Snapshots are similar to Global Snapshots, but their scope is restricted to the state of devices on the channel they belong to. When a Clip contains a snapshot, the Snapshot icon ![]() is displayed next to the name of the Clip.
is displayed next to the name of the Clip.
The Create Snapshots on New Clips preference determines whether a Clip Snapshot is automatically taken whenever a new clip is created. Invert the default behavior by holding the SHIFT key when creating a clip.
When the Clip Snapshot is active, it is recalled when the clip is launched.
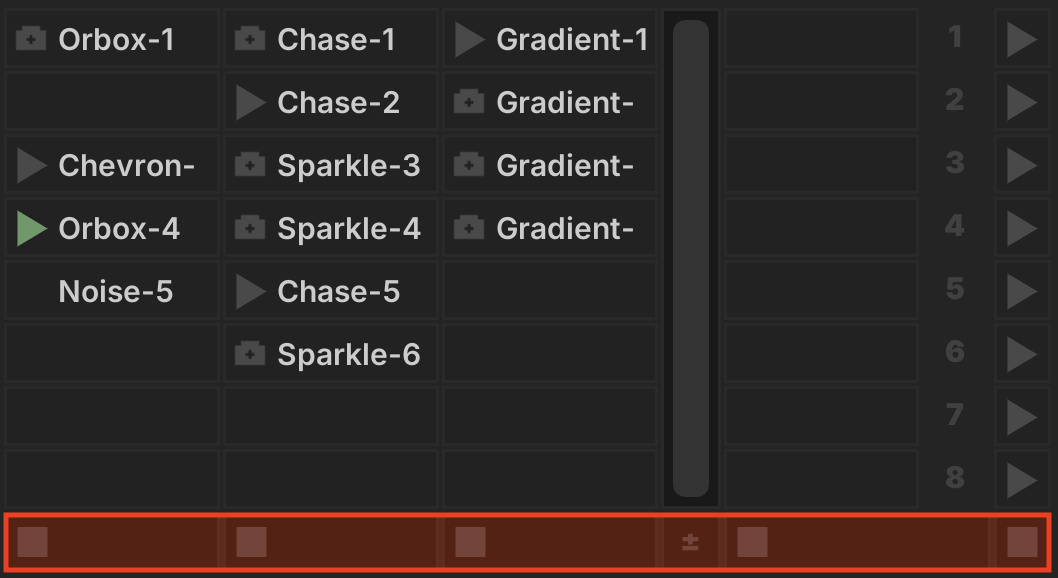
Clip Stop
Stop active clips using the Clip Stop buttons at the bottom of the Grid.
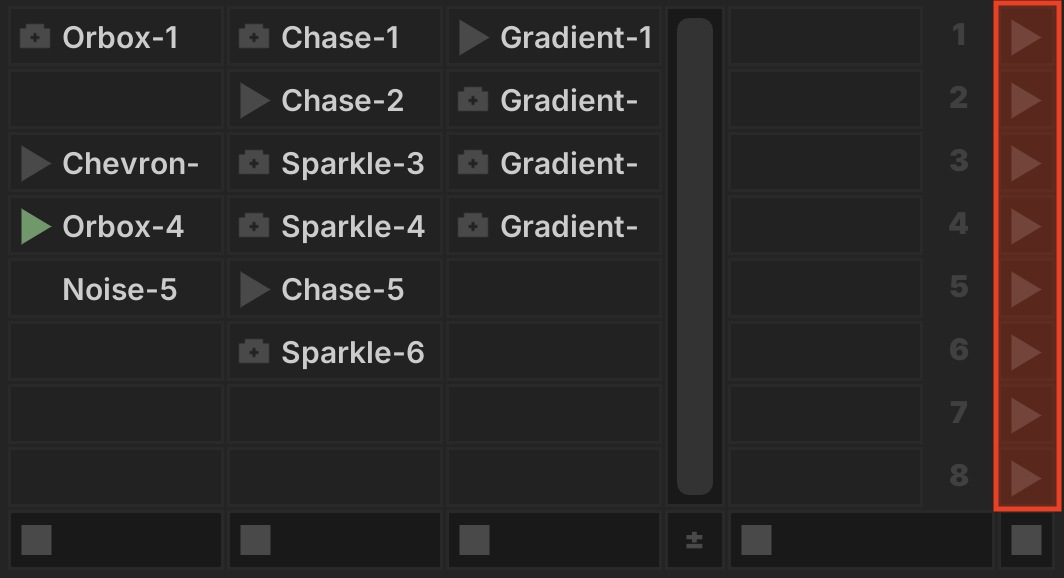
Clip Scene Launch
Launch all clips at the same index across the grid using the Clip Scene Launch buttons on the right-hand side of the Grid.
Clip Inspector
The Clip Inspector is shown alongside the Grid and displays the state of the focused clip.
Automation
Clip Automation settings are shown on the left side of the Clip Inspector in the section indicated by the automation icon ![]() .
.
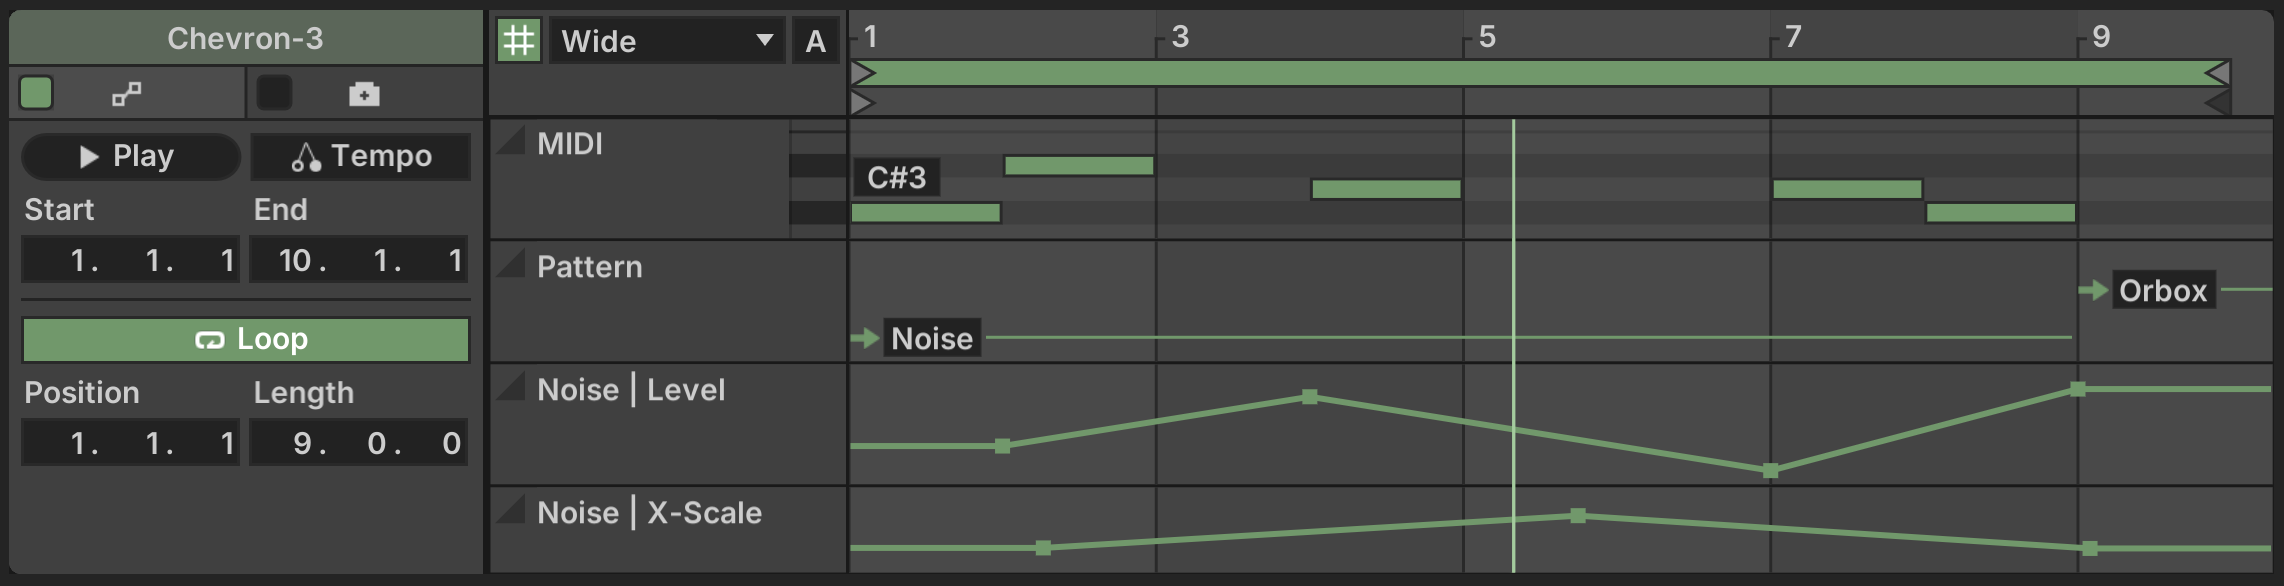
The Enabled toggle controls whether Clip Automation is active.
Control fields are as follows:
- Play: Trigger immediate playback of the automation SPACE
- Time Base:
TempoorAbsolutetime - Start: Playback start time
- End: Playback end time
- Loop: Whether looping playback is enabled ⌘L
- Position: Loop start time
- Length: Loop length
Time Base
Clip automation can be recorded and played back using one of two time scales.
The Tempo time base keeps track of events in musical time (bars + beats), playing them back in sync with the project tempo. When the metronome speeds up or slows down, clip playback will observe the change.
The Absolute time base is based upon the wall clock (minutes + seconds), playback speed is independent of the musical tempo settings.
Snapping
The Clip Automation data is drawn on the Clip Timeline UI with the following options:
- Snap: Whether to snap mouse-edit events to the grid ⌘4
- Snap Mode: Whether the snap grid size is fixed or relative to UI width ⌘5
Increase or decrease the snap size with ⌘1 + ⌘2.
Hold down the ⌘ key while performing mouse operations to invert snapping behavior.
Ruler
At the top of the Clip Timeline the Ruler allows for zooming and scrolling by clicking + dragging when the magnifying glass icon is visible. When Follow ⇧⌥F is enabled the Clip Timeline will automatically scroll during playback.
Loop Brace
Beneath the Ruler, the Loop Brace displays the loop position, which may be edited by clicking and dragging the handles.
Scrub Lane
The Scrub Lane shows the Start and End points, which may be edited by clicking and dragging the handles. Click in the Scrub Lane to begin playback from the specified point.
Automation Lanes
Automation Lanes can be collapsed/expanded by clicking the expander icon, or by pressing RETURN.
Press ⌘RETURN to maximize the height of a lane.
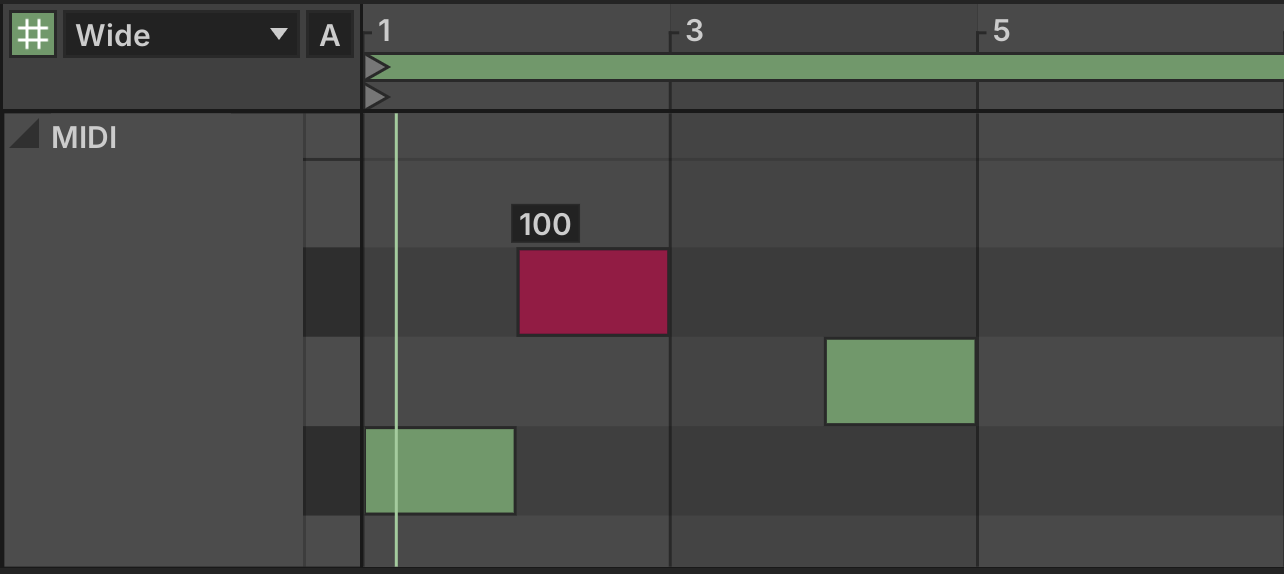
Editing
Timeline events can generally be edited and created by double-clicking and dragging. Hold the ⌘ key to view and edit the velocity of MIDI notes instead of their pitch.
Click and drag to select ranges of parameter events, which can be scaled using the handles on the range selection box.

Snapshots
Clip Snapshot settings are stored on the right-pane of the Clip Inspector in the section indicated by the snapshot icon ![]() .
.
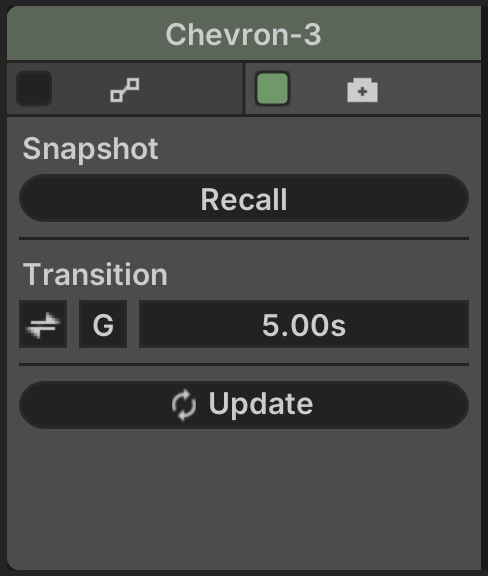
The Enabled toggle controls whether the Clip Snapshot is active.
Control fields are as follows:
- Recall: Recall the Snapshot settings immediately
- Transitions:
 Whether settings are interpolated on snapshots recall
 - Custom Transition Time: Controls how long interpolation between snapshots takes
G: Uses a Global transition time, applied to all Clip SnapshotsC: Uses a specific transition time, particular to this Clip
- Transition Time: Edits the transition time, as selected by the previous control
- Update:
 Updates the Clip Snapshot with the current settings